Search Recipe in This Blog

Sunday, November 11, 2012

YAPPUCCINO (YANNY'S FRAPPUCCINO)


Pardon the silly name please.  Silliness aside, this is our family's favorite frappuccino.

Ingredients (for 1 serving):

3 tbs Caffe D'Vita
3 tbs cold-brewed coffee
3/4 cup fat free milk
5 ice cubes


Direction:
Blend all the ingredients together for 15-20 seconds until the desired chunkiness of the ice.  I suggest to not blend it too long (more than 30 seconds) as the milk will start to separate to the top.  I use Magic Bullet to blend.

Enjoy our recipe!  Please let us know in the comment below if you try it.

COLD-BREWED COFFEE


We don't have (and not planning to get) an espresso machine at home.  If you know my hubby, he LOVES coffee.  He used to buy coffee daily when we were newlyweds.  Wasn't the best idea for our savings and his health.

In my effort to still serve him delicious homemade coffee at a fraction of the cost, I use cold-brewed coffee.  Please note that cold-brewed coffee is NOT iced coffee.  According to my coffee-drinker hubby, cold-brewed coffee is less sour (easier on the stomach), less thick and less caffeinated (which can be good or bad depending on your situation) than that brewed hot.

We've been cold-brewing the coffee since our son was born.  And finally, we have a recipe to share with you.

Ingredients (for 2 cups):

1/3 cup coffee beans
2 cups cold cooked water


Direction:
1) Grind the coffee bean coarsely.  We use Magic Bullet to grind.


2) Put the ground coffee in a cup and slowly pour the water.  Stir to mix well.  Cover and let it sit at the room temperature for at least 12 hours.


3) In 12 hours, the mixture will get a LOT darker.  Strain the ground coffee and set aside to use as air freshener


4) Next, place a coffee filter on the strainer and strain the coffee liquid.


5) Once completely filtered, place the coffee in a jar and put it in the refrigerator for up to 2 weeks.  It is highly concentrated and can be used for your hot or cold coffee mixture.  A little really goes a long way.

Enjoy and let me know in the comment below if you try it.


CAFFE D'VITA


I use this Caffe D'Vita to make my hubby's favorite Yappuccino and Mocha Ice Cream.  I only know two places that sell this: Costco for $10 or Amazon.  This is by far our family's all-time-favorite coffee mix.

Wednesday, September 12, 2012

BANH MI (VIETNAMESE ROAST BEEF SANDWICHES)


Ingredients (for 4 sandwiches):

1/8 tsp kosher salt (for seasoning the steak)
1/2 tsp salt (for making the pickled veggies)
1/8 tsp ground black pepper
3/4 lbs beef flank steak
2 tbs rice vinegar
1 tbs fish sauce
1 tbs low sodium soy sauce
1 1/2 tsp sugar
1 jalapeno pepper, thinly and diagonally sliced
1 cup carrot, matchstick-cut
1/2 cup radish, matchstick-cut and soaked in cold water for 15 minutes (to reduce bitterness)
1 baguette, halved lengthwise and toasted
1/2 cup cilantro leaves (I skipped this because my husband doesn't like cilantro; but definitely try it with cilantro if you like them.  They add so much flavor and nice smell to the sandwiches)
(Optional) Mayonnaise
(Optional) Sriracha sauce

Direction:
1) SAUCE: In a bowl, mix well rice vinegar, fish sauce, soy sauce, and sugar.

2) PICKLED VEGGIES: Put carrot, radish, and jalapeno pepper in a container.  Add salt and shake together in a closed container.  This process is to make the pickled veggies crunchy and reduce the bitterness of the radish.  Leave it for 15 minutes until the water comes out like the photo below.  Then wash in cold water, drain, and add 1 tbs of the sauce mixture.  

Note: If you like your radish a bit bitter, the pickled veggies are ready for you to use now.  If you like your radish bitter-free like I do, place it in the refrigerator overnight before using.  


3) Season the beef with kosher salt and pepper evenly on both sides.


4) In medium-high heat, cook the beef on both sides until the desired doneness.  I took me about 10 minutes to make it well-done.


5) Once cooked, set aside for 5 minutes before cutting them thinly and diagonally.  Avoid cutting them right away as that will release the juice from the meat and make the meat a bit drier.


6) Then toss the remaining of the sauce mixture with the meat.


7) Place the meat and pickled veggies in the baguette and eat before the baguette gets tough on you!!!!  You can also add a mixture of mayonnaise and Sriracha sauce if you'd like.  But this sauce is already really tasty.  ENJOY!!!

Friday, August 24, 2012

SPINACH BACON GYOZA

Adapted from Ochi

Ingredients (for 24 gyozas):

1 bunch spinach
1/2 medium onion, minced
4 oz bacon, cut small (I used turkey bacon; and it's still really tasty)
Salt
Pepper
Gyoza or dumpling wrappers
2 slices of cheese
180 ml water (to melt the cheese)
Oil (for pan frying)
Balsamic vinegar (for sauce)

Direction:
1) Boil water and add spinach for 1 minute. Drain, soak in cold water, and remove the excess water by squeezing it (using paper towel)


2) Cut the spinach into small size


3) Heat oil in the pan then add the bacon for 1 minute


4) Then add onion and cook until translucent


5) Add the spinach, salt and pepper.  Stir well and let it cool


6) Place the filling in the center of the wrapper, wet the edges of the wrapper using water, and then wrap well


7) Tear the cheese into smaller parts then add them into the water.  Put it in the microwave for 30 seconds (until they are slightly melted).  Stir well


8) Add oil to the frying pan and then place the gyoza over high heat until the bottom becomes golden brownish.  Then, turn down the heat to medium high and add the cheese mixture.  Cover and cook until the liquid is gone


9) Serve with balsamic vinegar.  YUM!!!!!

Thursday, August 23, 2012

FRUIT LOOPS CHEESE TRUFFLES

Adapted from Ochi
Ingredients (for 16 balls):


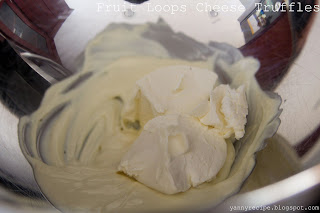
4 oz cream cheese, softened to a room temperature
4 oz white chocolate
1 cup Fruit Loops, broken coarsely (for filling)
4 cups Fruit Loops (for coating)

Note: I use Fruit Loops cereal instead of the Japanese rice puffs (hina-arare) as the original recipe calls for.  Mine turned out a bit too sweet for my taste because of the Fruit Loops that is already sweet as is also the chocolate I used is more on the sweeter end.  I think I would use unsweetened or slightly sweetened rice puffs and a different brand of white chocolate.  If you have any recommendations for the white chocolate that I can try, please leave a comment below :-)

Direction:
1) Melt the chocolate using a double boiler method like below (place a container over a boiling water before placing the chocolate in it)


2) Once the chocolate has melted, add the cream cheese and mix well


3) Then add the Fruit Loops for filling and mix well gently


4) Divide the mixture into 16 and round each into a ball


5) Then roll it in Fruit Loops for coating 


6) Place it in the refrigerator to set it and then serve.  ENJOY!!!

Note: I brought mine to a hot and sunny swimming day of 90 F for the kids to enjoy.  The truffles ended up melting like crazy and became soggy (yikesss ... sorry kids!!!).  My recommendation is to serve them fresh from the refrigerator and enjoy them right away.

Thursday, August 16, 2012

TERIYAKI MEATBALLS A LA OCHI


Adapted from Ochi

Ingredients (for 12 meatballs):


1/2 lbs ground pork
1 cup Ma Ling, cubed (I like Ma Ling better than SPAM because it's less salty)
1/2 cup mixed vegetables
1 clove garlic, grated
1 tbs grated ginger (if you don't like ginger, you can skip this.  It will still be yummy)
1 egg white
1 tsp corn starch
Salt
Pepper
2 tbs soy sauce
2 tbs mirin
1 tbs cooking oil


Direction:

1) Mix well ground pork, garlic, ginger, egg white, corn starch, salt and pepper


2) Then add Ma Ling and mixed vegetables.  Mix well


3) Divide the mixture into 12


4) Round them into balls


5) Heat oil in the pan and cook the meatballs until slightly golden-browned with a lid on


6) Open the lid and turn the meatballs over.  Mix well soy sauce and mirin then add the mixture to the pan.  Simmer on medium low heat until the sauce dries up


7) Serve with rice or as an appetizer.  Enjoy!!!